3D measuring technologies
Name of the machine: 3D scanner Yxlon FF35 CT (Computer Tomography)
Type of the machine: high resolution industrial CT system
Restrictions: dimensions of the product, complexity of the product, access to use the machine
3D scanner, Yxlon FF35 CT
Manufacturer: Yxlon
Model: Yxlon FF35 CT
Functioning principle: 3D scanning (X-ray tube)
Dimensions of the machine: 2990 mm x 2200 mm x 1550 mm
Unit includes: measuring machine, operator workplace, controller with software
Working area: diameter 300 mm, height 500 mm, weight 30 kg
Measuring time: depends of the size and the complexity of the product
DAVID SLS-3 HD scanner
Manufacturer: David Vision Systems (now owned by HP)
Model: DAVID SLS-3 HD
Functioning principle: 3D scanning using structured white light
Dimensions of the machine: (P)500 mm * (L)200 mm * (K)500 mm
System includes: camera David CAM 3.1, David HD video projector,
setup ruler, tripod, PC with software
Working area (maximum dimensions of the product): from 10 mm up to 600 mm
Resolution: 0,05% of the objects maximum dimension (from 0,04 mm)
Scanning time: 2…4 s/per scan
Formats of the model: obj, stl, ply
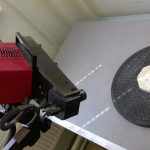
Name of the machine: 3D scanner ATOS II 400 (Structured Light)
Type of the machine: scanning devices
Restrictions: dimensions of the product, access to use the machine
Video about technology:
GOM ATOS II 400 scanner
Manufacturer: GOM
Model: ATOS II 400
Functioning principle: 3D scanning using structured white light
Dimensions of the machine: (P)300 mm * (L)500 mm * (K)500 mm, mobile
System includes: camera, tripod, table, PC with software
Working area (maximum dimensions of the product): practically unlimited (scanned models can be stitched together)
Resolution: depends of the object distance (from 0,02 mm up to 0,79 mm)
Scanning time: depends of the product complexity
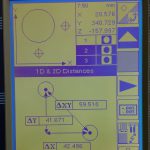
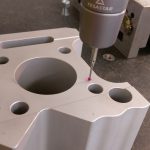
Name of the machine: 3D measuring machine TESA Microhite 3D
Type of the machine: measuring devices
Restrictions: dimensions of the product, product complexity and shape, access to use the machine
Video about technology:
TESA MicroHite 3D measuring machine
Manufacturer: TESA SA (Hexagon Metrology)
Model: Tesa Micro-Hite 3D
Functioning principle: measuring of the product by using a probe
Dimensions of the machine: 800 mm x 1000 mm x 1500 mm
System includes: measuring machine, probes, controller with software (Reflex)
Working area: 600 mm x 600 mm x 600 mm
Uncertainty: +/- 0,05 mm (depends on the product dimensions)
Measuring time: depends on the product complexity and number of measurements
Name of the machine: 3D measuring machine Aberlink Axiom too 600
Type of the machine: Contact Measuring Macine (CMM)
Restrictions: dimensions of the product, complexity of the product, access to use the machine
3D measuring machine Aberlink Axiom too 600
Manufacturer: Aberlink
Model: Aberlink Axiom too 600
Functioning principle: 3D measuring 3D of the model by using touch probe
Dimensions of the machine: 900 mm x 1200 mm x 2300 mm
Unit includes: measuring machine, touch probes, controller with software (Aberlink 3D software)
Working area: 640 mm x 600 mm x 500 mm
Measurement uncertainty: TP20 (2.4 + 0.4L/100) µm (depends on the size of the product)
Measuring time: depends on the size and the complexity of the product
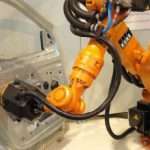
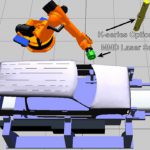
Name of the machine: 3D scanner Nikon (infrared LED laser) + ABB robot
Type of the machine: scanning devices
Restrictions: dimensions of the product, access to use the machine
Nikon MMDx100 scanning device
Manufacturer: Nikon Metrology Europe + ABB
Model: Nikon MMDx100 system + ABB IRB1600-10 robot
Functioning principle: 3D scanning using the LED laser
Dimensions of the machine: robot (800x800x1200 mm), controller
(600x800x1000 mm), tripod for cameras
System includes: robot, measuring head, camera, tripod, controllers, PC with software (Focus Point Cloud Inspection)
Working area (maximum dimensions of the work envelope): volume about 17 m3,
practically unlimited (scanned models can be stitched together)
Resolution: 2 microns when distance from camera is 2500 mm
Scanning time: depends of the product complexity
